How to build a neumorphic Flutter Clock?
I was lucky to be one of the honorable mentions in Flutter Clock challenge organized by Google and Lenovo. My analog clock gained a bit of popularity on Twitter, so I decided to show how I achieved this neumorphic look in Flutter.
BTW all the results are here.
I didn't have much time for that, but with my #FlutterClock challenge I wanted to create something using #neumorphic design. It's very simple but I'm happy with few little details that I could fit in. #Flutter pic.twitter.com/S9nEL0juGY
— Dominik Roszkowski 🍪 (@OrestesGaolin) January 21, 2020
Foreword
Neumorphic design became pretty popular these days. Many designers and developers tried to achieve this new skeuomorphic look. When Flutter Clock challenge was in progress we were preparing to Flutter Europe conference, so I didn’t have much time for my submission. However, the example app prepared by the organizers was so flexible that I was able to finish my design in couple of evenings.
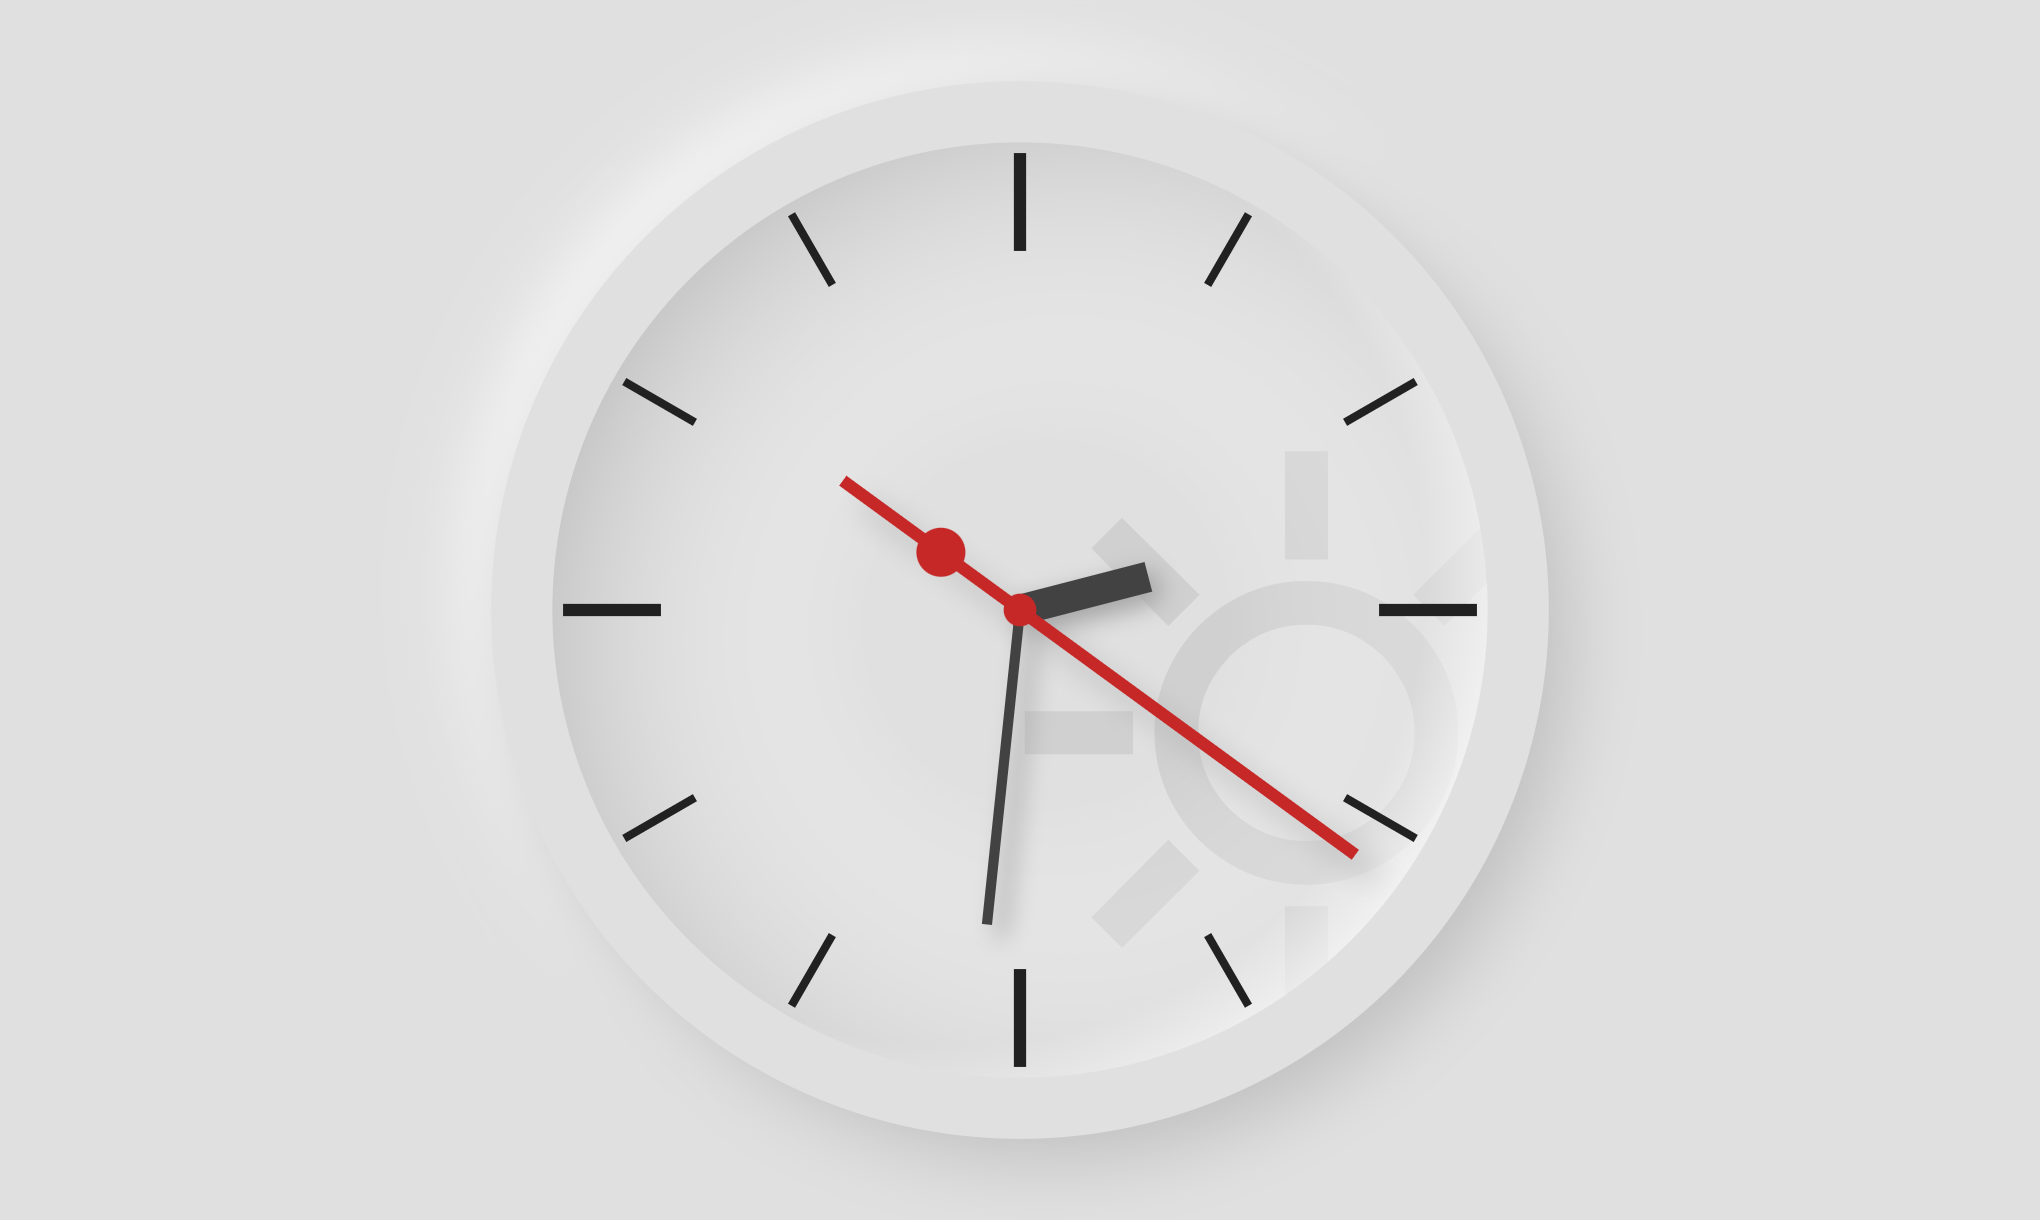
Few main features of this clock face are:
- it’s analog clock
- it supports light and dark mode
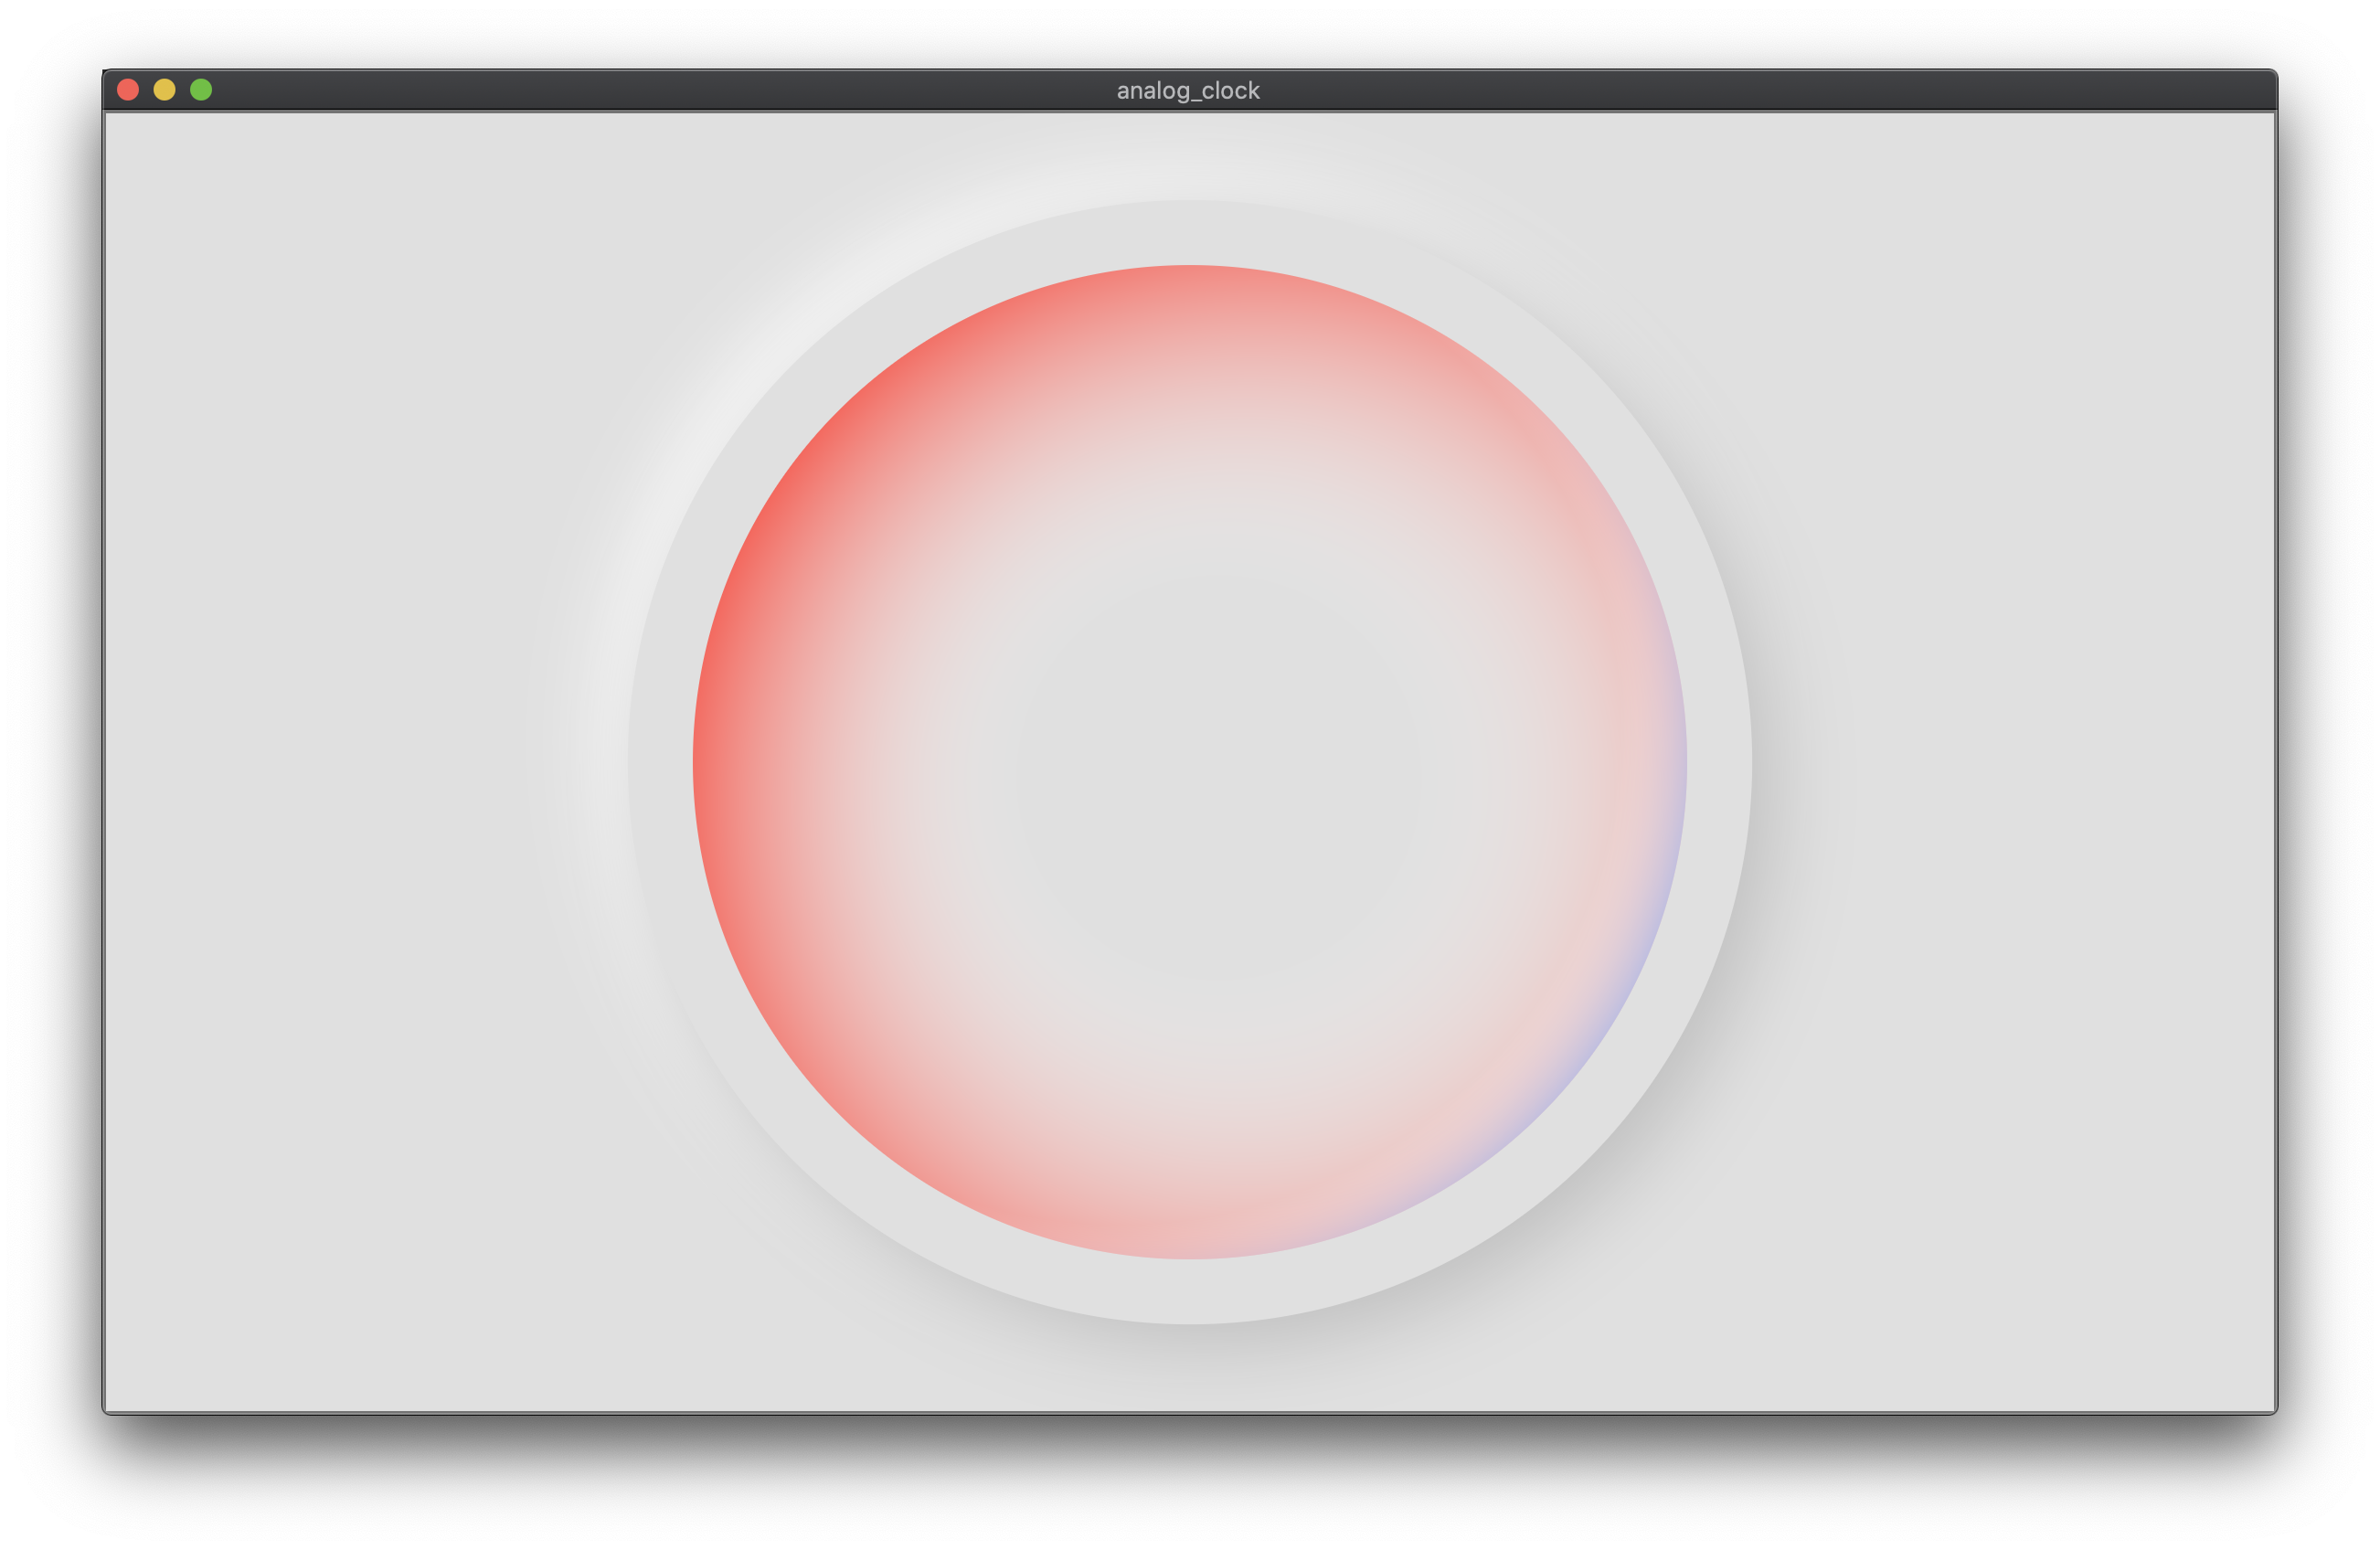
- it shows a large dim icon with current weather condition
- movement of clock hands is animated (i.e. it’s continuous even though it looks like it’s stepping every second)
Some of you perhaps realized, that I was heavily inspired by the Swiss clock design. The original has much sharper edges and opposite layout of the seconds hand, though.
Codepen
Thanks to Maria Jose my clock is available as codepen:
See the Pen Neumorphic Clock - @orestesgaolin by CodePen (@codepen) on CodePen.
Basics of neumorphic design
In neumorphic design the most important part is the illusion of continuity between protruding parts and the background. It can be achieved with a simple trick.
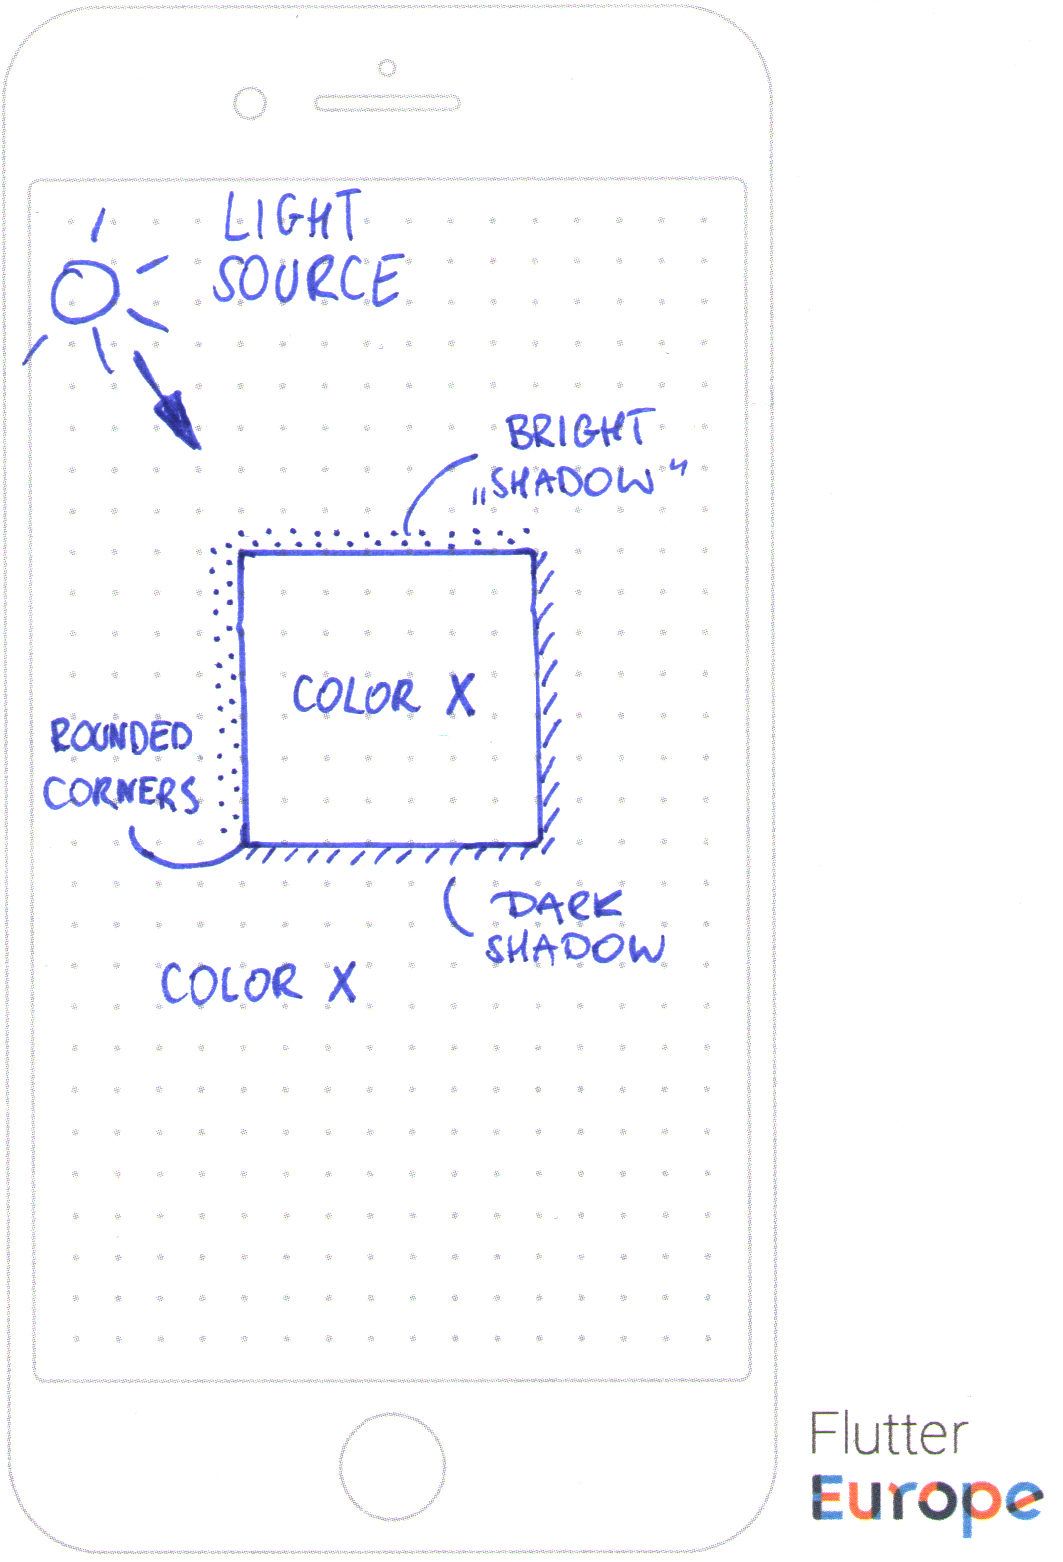
You need to imagine a light source at a relatively large distance so that the shadows are parallel to each other and they appear softer than usual. It should be similar to typical sun rays but on a smaller scale.
The important feature is that the protruding object and the background should have the same or very similar color (color x on the image). This gives an illusion of a single material and helps a bit with selecting shadow colors. For the material use a color that’s a bit darker than white, because you’ll need white (or some light shade of your color) for the top light reflection (bright shadow on the image)1.
I found that the easiest way is to select the same color but with different brightness for the dark and light shadows. In Flutter this is very easy if you use MaterialColor and their shades.
Easy part - outer shadows
If we want to achieve the illusion of a protruding object we just need to add outer shadows to our Container. Remember that this effect looks the best in case of objects with rounded corners.
// Shadow color (canvasColor): Colors.grey[500],
// Inner shadow color (dividerColor) Colors.grey[400],
// Background color: Colors.grey[300],
return Container(
  decoration: BoxDecoration(
    shape: BoxShape.circle,
    color: customTheme.backgroundColor,
    boxShadow: [
      BoxShadow(
        color: darkMode ? Colors.white.withOpacity(0.2) : Colors.white,
        // unit is some relative part of the canvas width
        offset: Offset(-unit / 2, -unit / 2),
        blurRadius: 1.5 * unit,
      ),
      BoxShadow(
        color: customTheme.dividerColor,
        offset: Offset(unit / 2, unit / 2),
        blurRadius: 1.5 * unit,
      ),
    ],
  ),
);
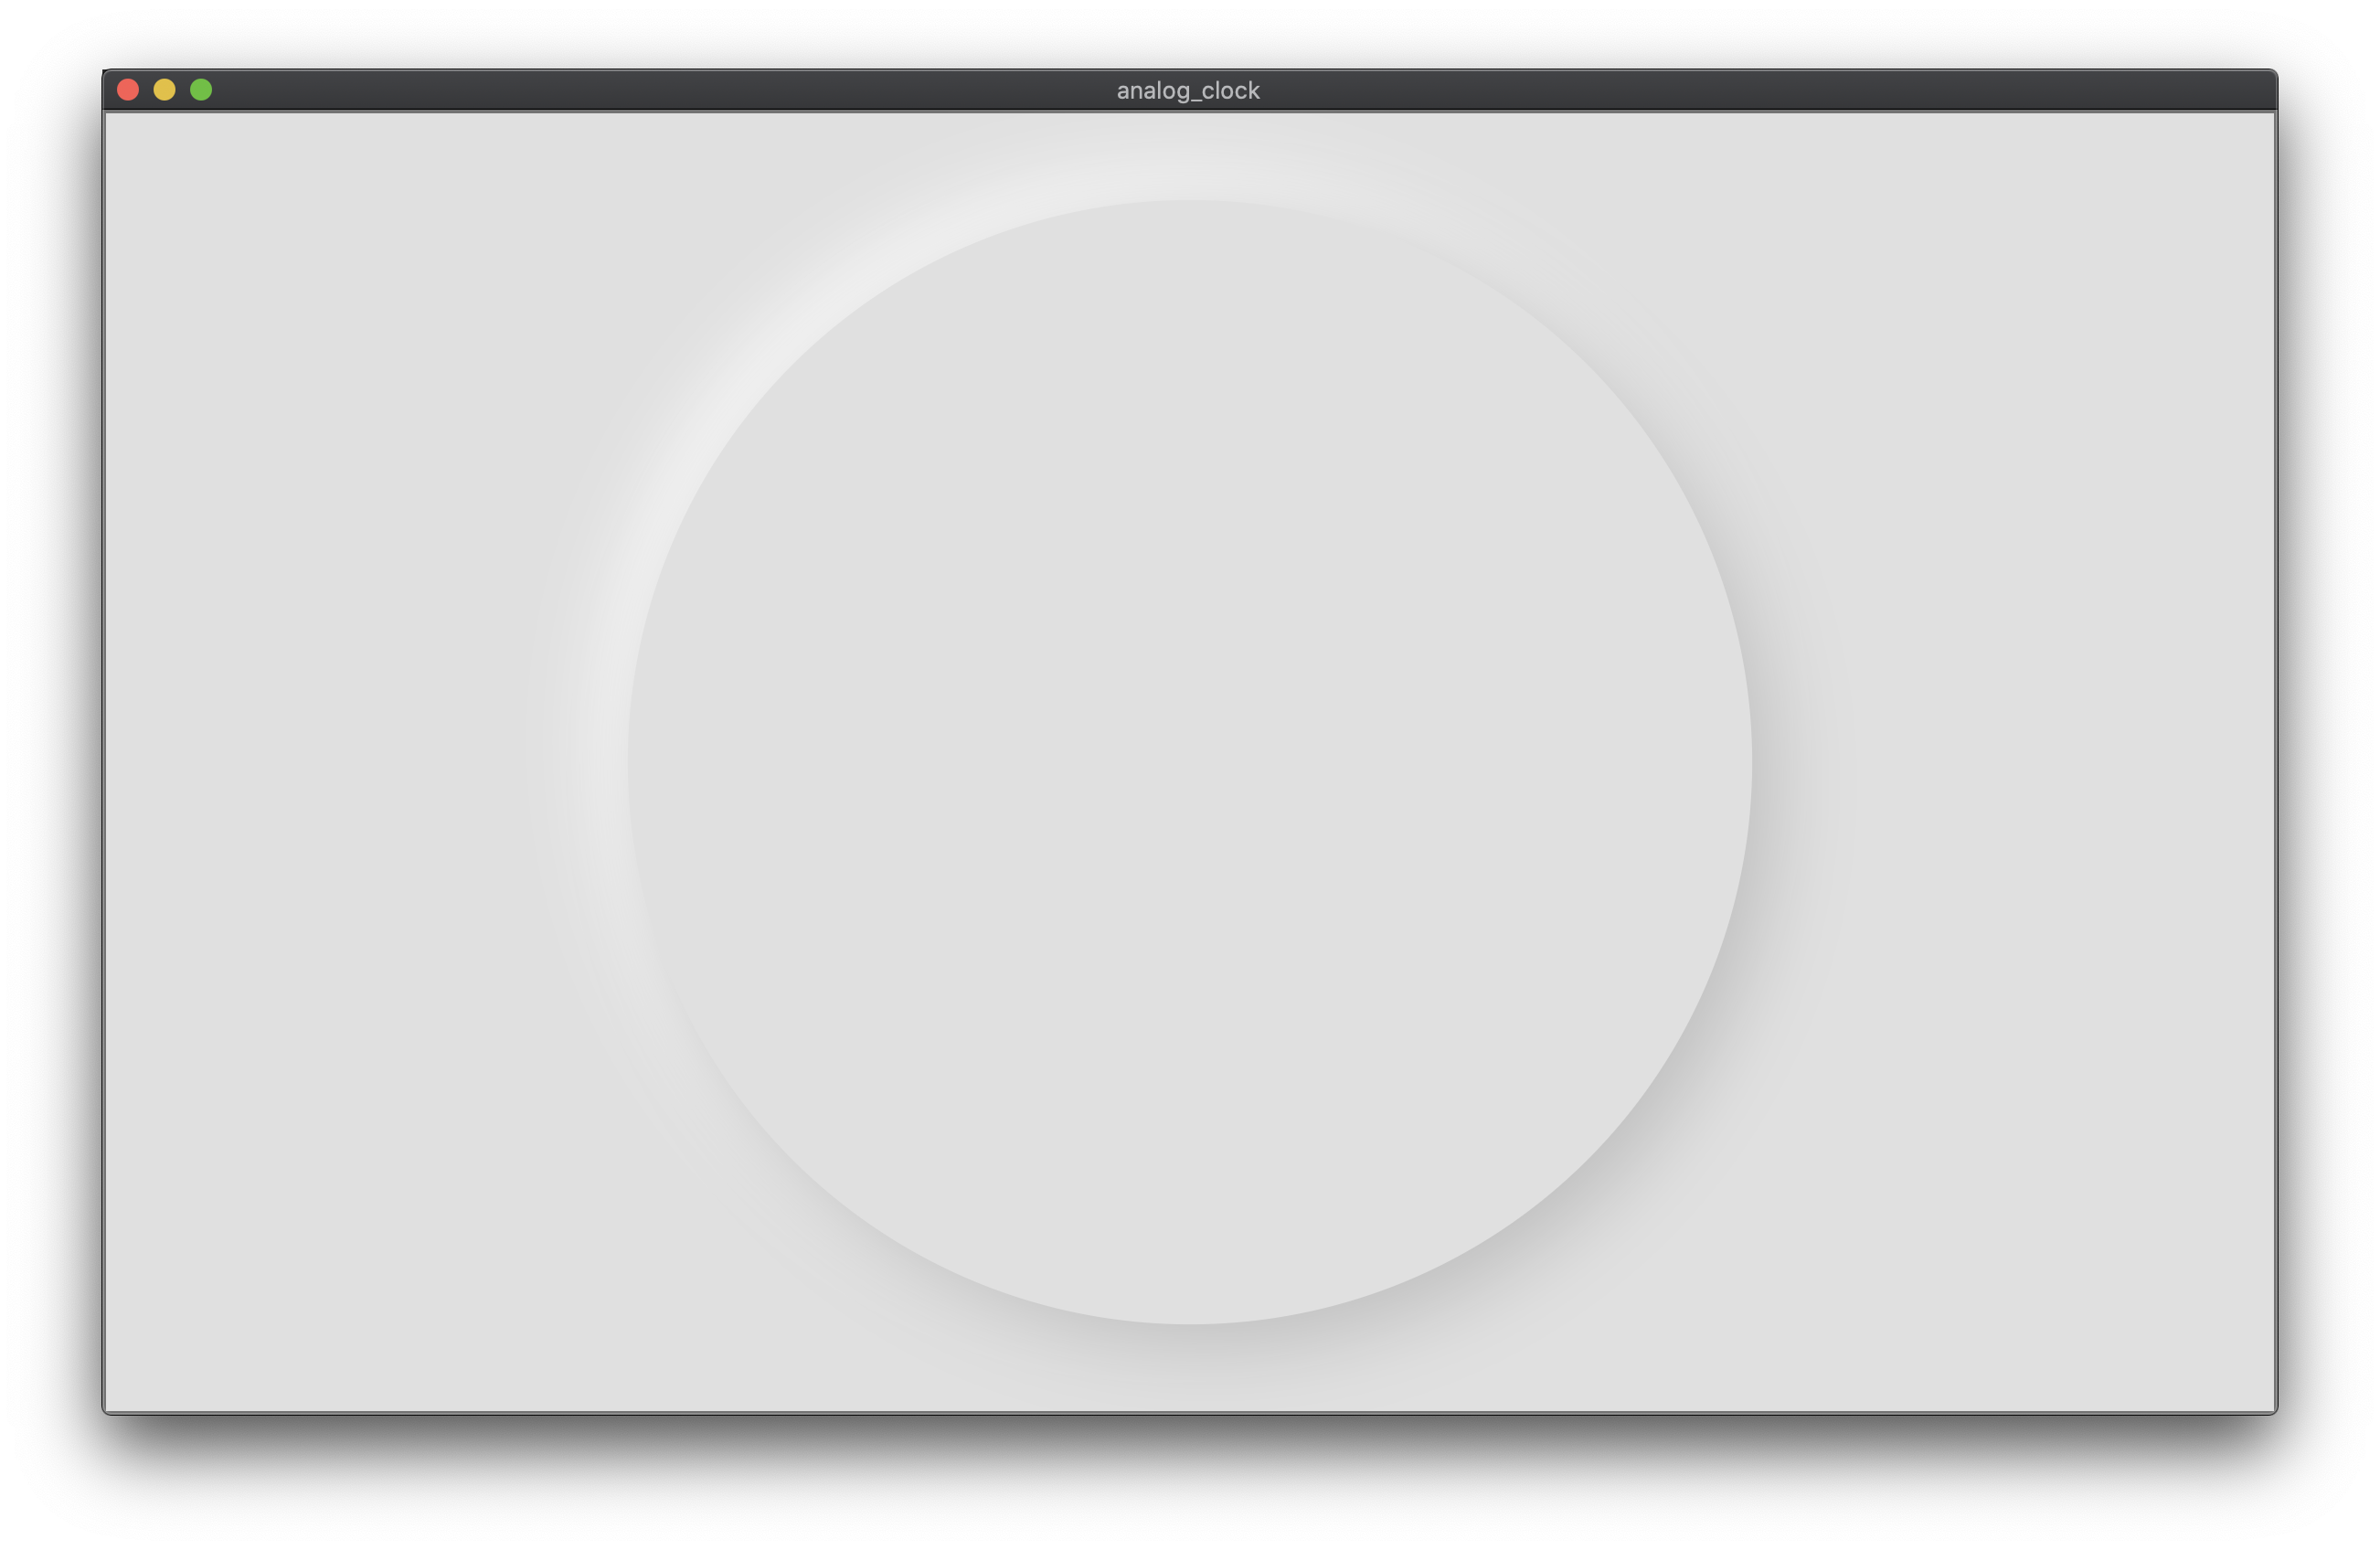
This gives us a following effect. Looks more or less like a torus extracted from the background. In case of circular shapes the shadow aligns correctly i.e. it’s radially longer in bottom right part and shorter in the middle.
Hard part - inner shadows
It’s much more difficult to create decent inner shadows in case of circular shapes. There’s no inner shadow property in Flutter so what I came up with is a combination of overlapping radial gradients. They had to be offset (center property) and tweaked a bit (radius, focalRadius and stops) to look realistic enough.
// Inner shadow color (dividerColor) Colors.grey[400],

return Stack(
  children: <Widget>[
    Container(
      decoration: BoxDecoration(
        shape: BoxShape.circle,
        color: customTheme.backgroundColor,
        gradient: RadialGradient(
          colors: [
            darkMode
                ? customTheme.backgroundColor.withOpacity(0.0)
                : Colors.white.withOpacity(0.0),
            customTheme.dividerColor,
          ],
          center: AlignmentDirectional(0.1, 0.1),
          focal: AlignmentDirectional(0.0, 0.0),
          radius: 0.65,
          focalRadius: 0.001,
          stops: [0.3, 1.0],
        ),
      ),
    ),
    Container(
      decoration: BoxDecoration(
        shape: BoxShape.circle,
        color: customTheme.backgroundColor,
        gradient: RadialGradient(
          colors: [
            darkMode
                ? customTheme.backgroundColor.withOpacity(0.0)
                : Colors.white.withOpacity(0.0),
            darkMode ? Colors.white.withOpacity(0.3) : Colors.white,
          ],
          center: AlignmentDirectional(-0.1, -0.1),
          focal: AlignmentDirectional(0.0, 0.0),
          radius: 0.67,
          focalRadius: 0.001,
          stops: [0.75, 1.0],
        ),
      ),
    ),
  ],
);
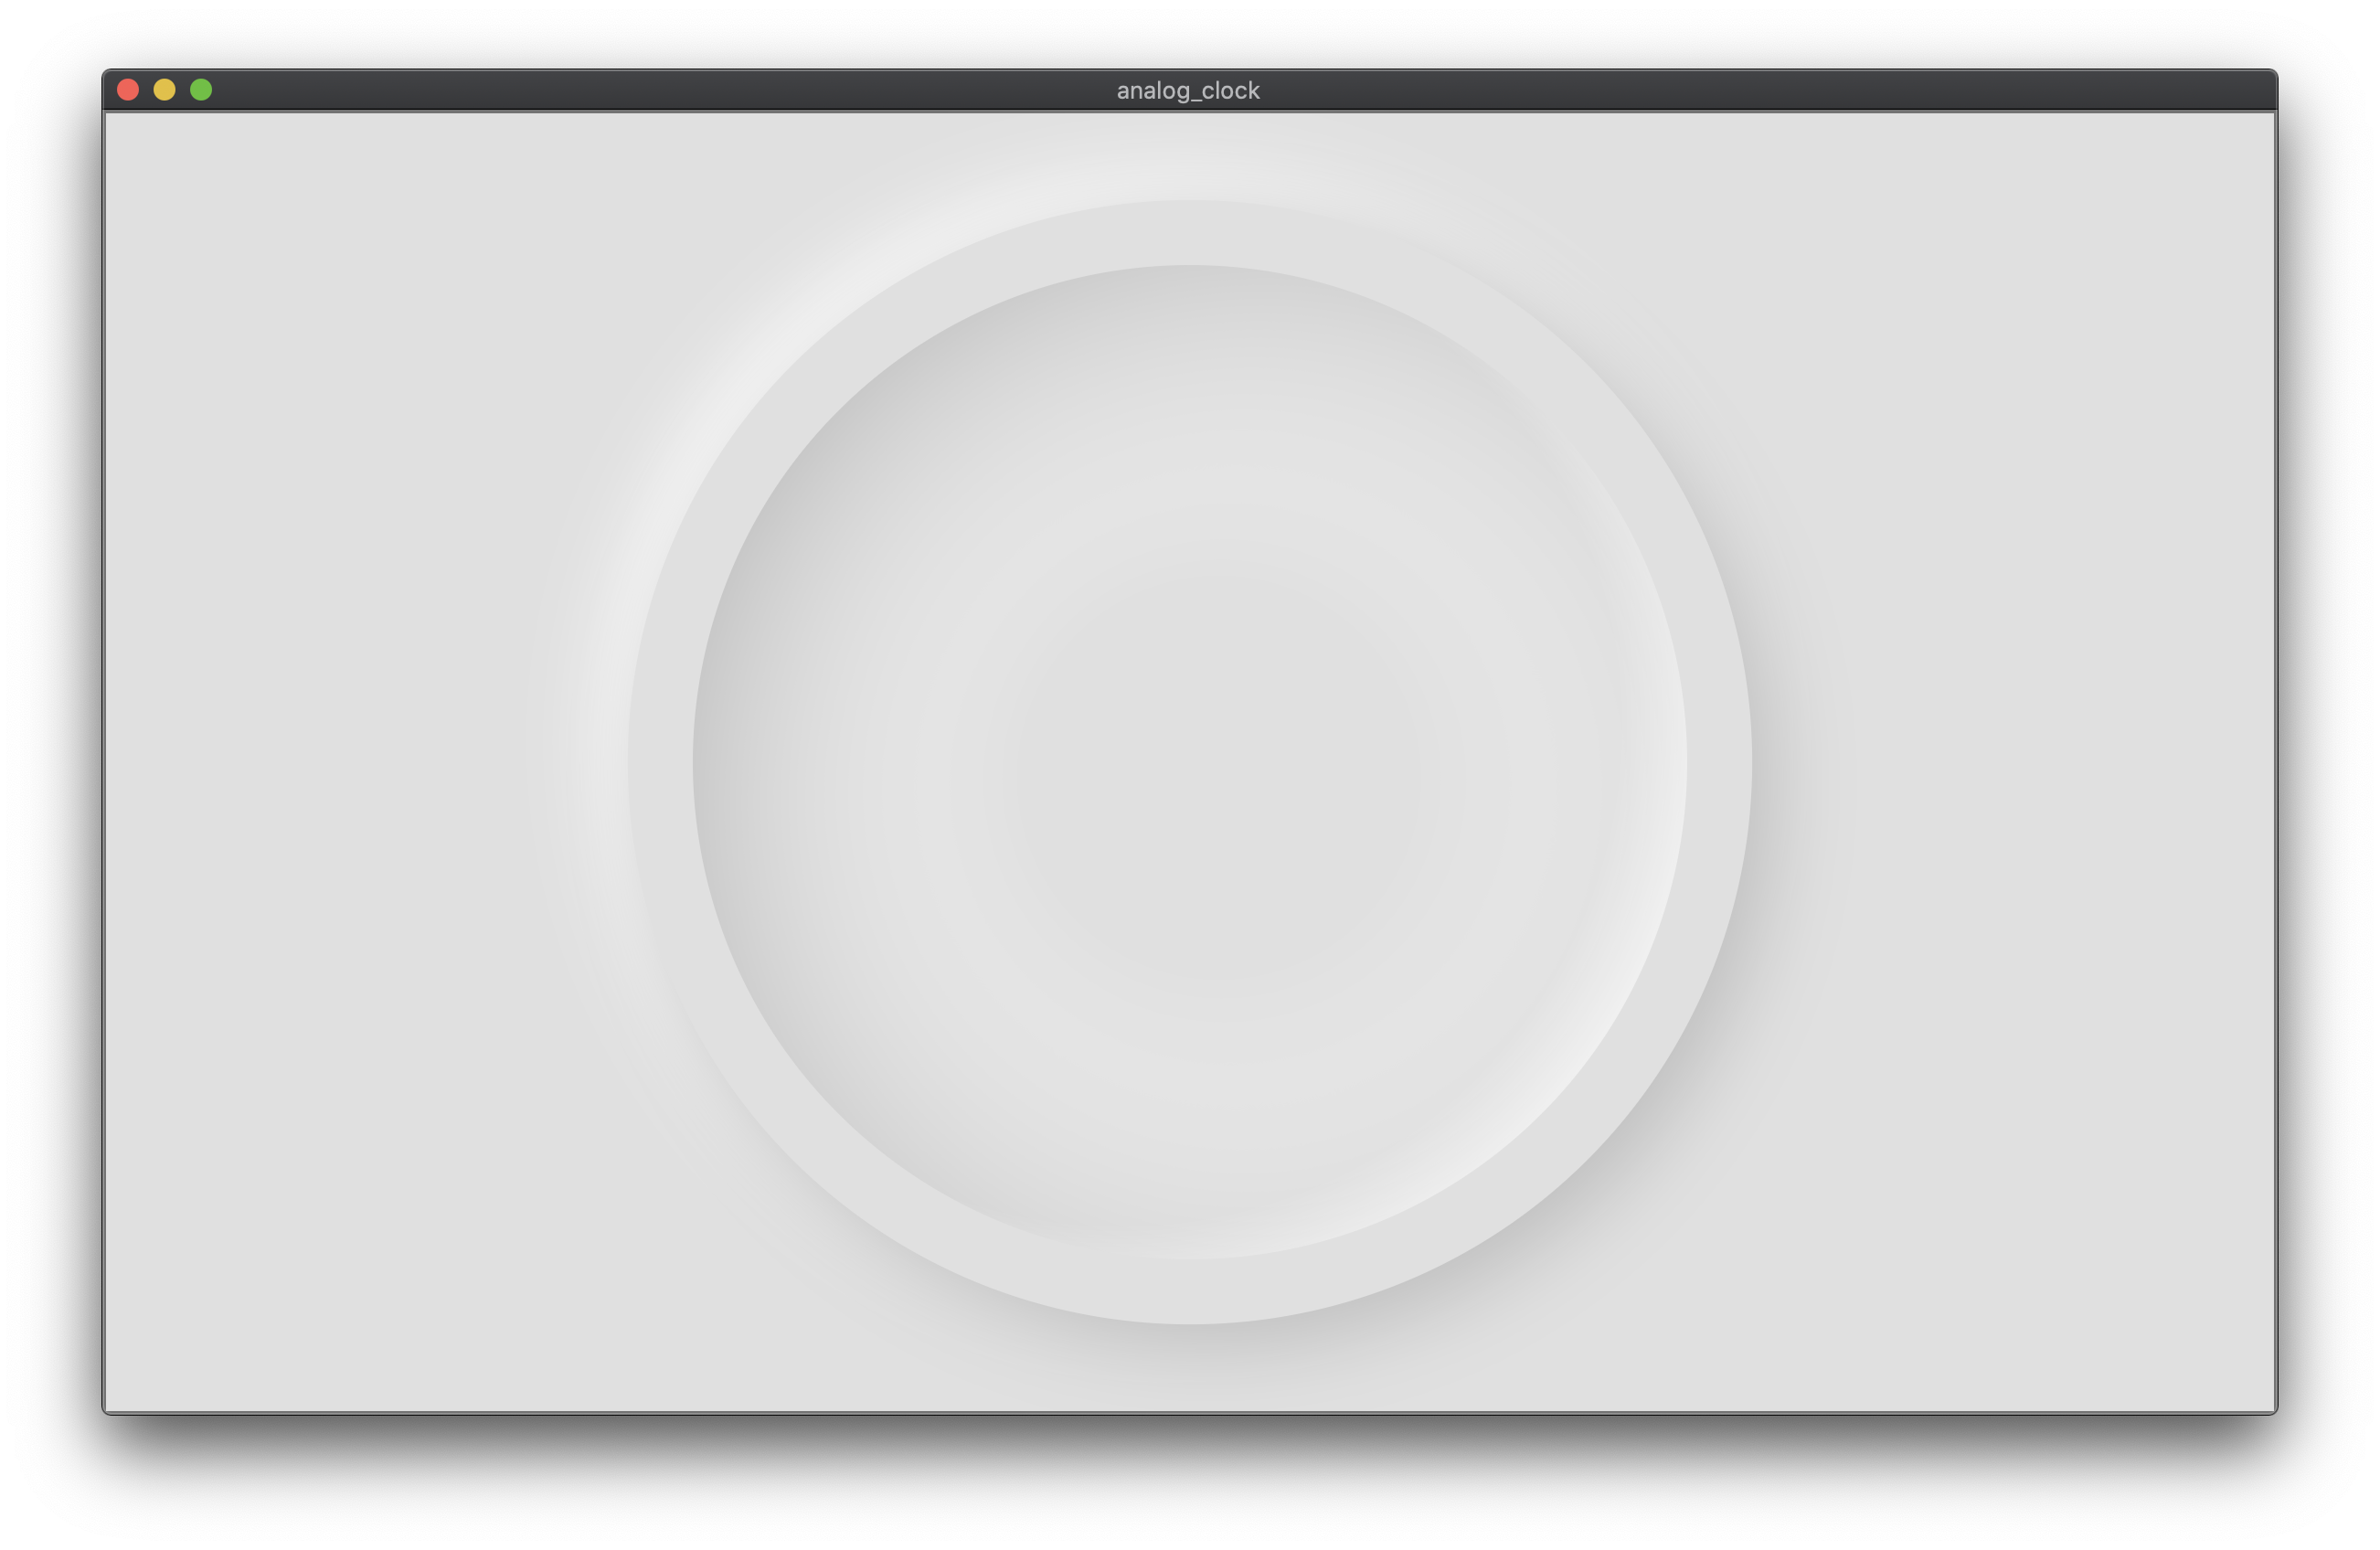
This way we have our inner shadows ready. Even though the alignment is not perfect it is enough to accept by our brains.
Tricky part - hand shadows
I wanted the hands to cast a shadow according to the light source. It was particularly tricky because as the hands’ positions are transformed around the clock pin, also the shadows of its containers would go together.
The easiest solution was just to duplicate the hands, translate them by some factor with Transform.translate() (more for the seconds hand, less for the hour hand as it’s closer to the background) and only then add shadows.
There should be a video of hands animating on the clock face. If not try to use different browser
This way I would have the same orientation of the shadow as the clock hand but always placed a bit to the right and below the hand. This simple step added another factor of 3-dimensionality to the design.
Wrap up
After this step and several other small tweaks the general layout of the clock looks following:
return Stack(
  children: [
    OuterShadows(),
    AnimatedClockIcon(),
    InnerShadows(),
    ClockTicks(),
    // hands shadows are below hands but above clock ticks
    HourHandShadow(),
    MinuteHandShadow(),
    SecondHandShadow(),
    HourHand(),
    MinuteHand(),
    SecondHand(),
    SecondHandCircle(),
    ClockPin(),
  ],
);
And the final result looks like this:
You can get the repository of the Flutter Clock here.
Huge congratulations to all the winners and great kudos to all 850 attendees. You did a great job and I was amazed to see some fantastic designs posted on Twitter.
-
I’m going to call both of the elements as shadows even though the top one is a reflection of the light shining at the edge. ↩